System Settings
It helps to change the general settings like date, currency, number etc in the program.
- After logging in to the Radix Main menu, Go to Config > System Settings.
- A multiple tab window will open as shown below showing "
 " by default.
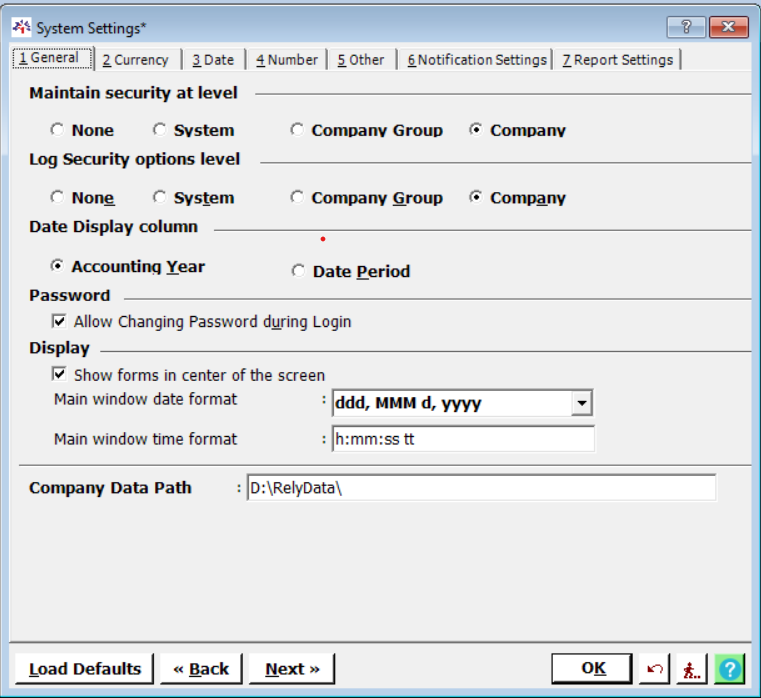
Maintain security at level |
Select where you want to maintain security. |
|
Log security options level |
Select where you want to maintain log security option. |
|
Date Display column |
Select where you want to display date column. |
|
Password |
Enable if want to change Password during login. |
|
Display |
Show forms in center of the screen |
Enable if want to see the forms in center of the screen. |
Main window date format |
Select the date format for main window. |
|
Main window time format |
Set the time format for main window. |
|
Company Data Path |
Set where you want to save data of company. |
|
- Switch to next tab "
 ", Here you can change the currency settings according to the requirement.
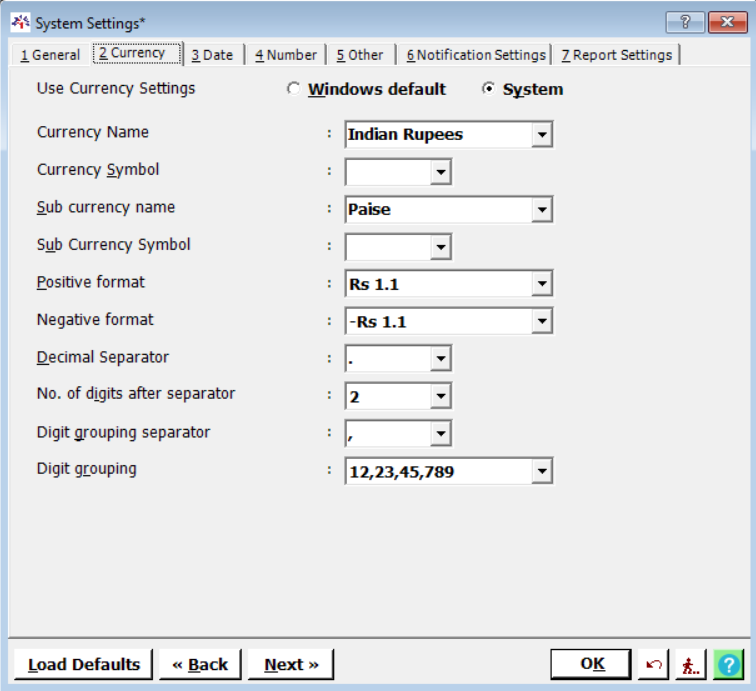
Use Currency Settings |
Select currency setting. |
Currency Name |
Select currency name. |
Currency Symbol |
Select currency symbol. |
Sub currency name |
Select sub currency name. |
Sub currency symbol |
Select sub currency symbol. |
Positive format |
Select the positive format. |
Negative format |
Select the negative format. |
Decimal Separator |
Select the symbol for decimal format. |
No. of digits after separator |
Select number of digits after decimal separator. |
Digit grouping separator |
Select the symbol for digit grouping separator. |
Digit grouping |
Select the format for digit grouping. |
- Move to next tab "
 ", Here you can change the date format.
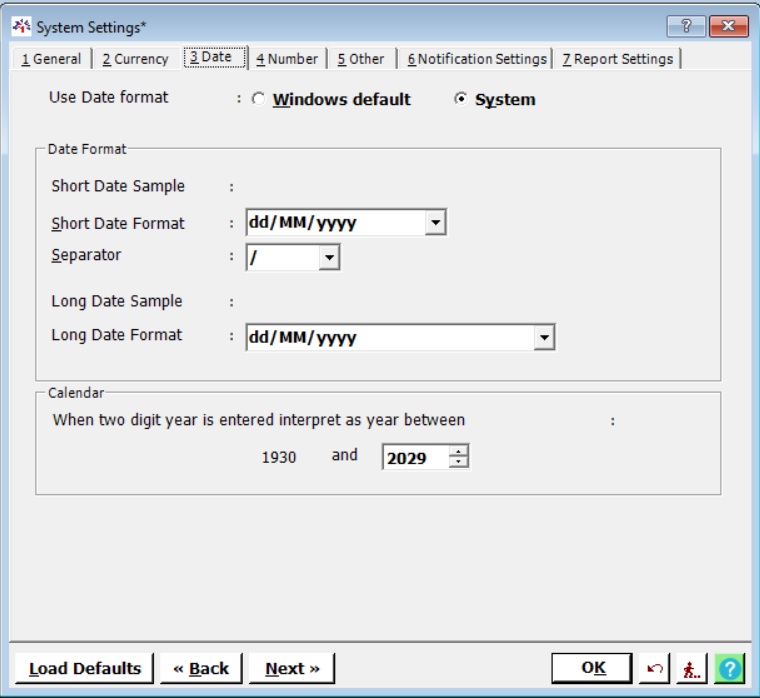
Use Date Format |
Select date format. |
|
Date Format |
Short Date Sample |
It displays the example of selected format for short date. |
Short Date Format |
Select the format for short date |
|
Separator |
Select the symbol for separating date, month and year. |
|
Long Date Sample |
It displays the example of selected format for long date. |
|
Long Date Format |
Select the format for long date. |
|
Calendar |
The financial year used should be between the selected year. |
|
- The next option is "
 ". You can change the format of numbers from here.
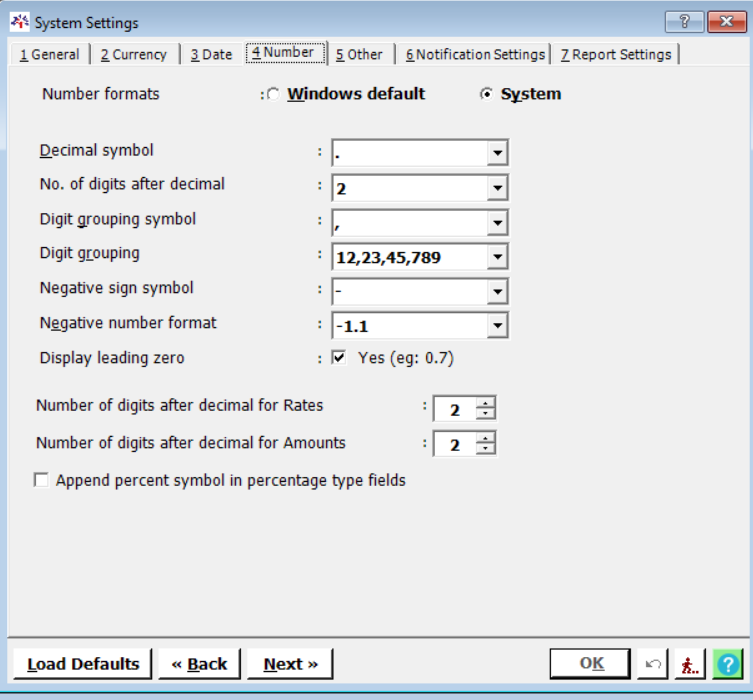
Number formats |
Select the number format. |
Decimal symbol |
Select the decimal symbol. |
No. of digits after decimal |
Select number of digits after decimal. |
Digit grouping symbol |
Select the symbol for digit grouping. |
Digit grouping |
Select the format for digit grouping. |
Negative sign symbol |
Select the symbol for negative sign. |
Negative number format |
Select the format for negative number. |
Display leading zero |
Enable if want to see zero before decimal symbol. |
Number of digits after decimal for Rates |
Select number of digits for rates after decimal. |
Number of digits after decimal for Amounts |
Select number of digits for amounts after decimal. |
Append percent symbol in percentage type fields |
Enable if want to see percentage symbol in fields of percentage. |
- Switch to next tab "
 ", Here you will find the option of file path and backup path.
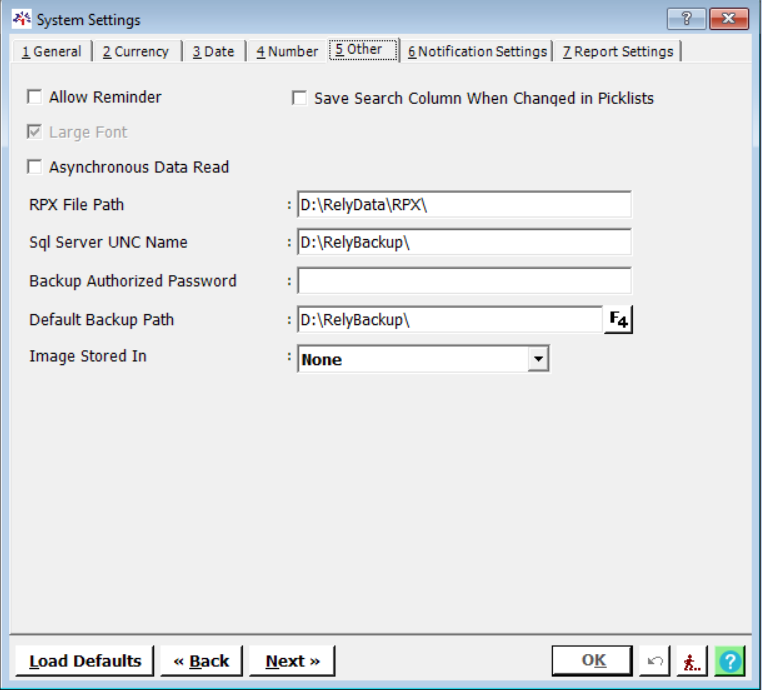
Allow Reminder |
Enable if you want to set reminder. |
Large Font |
Enable if you want large font. |
Asynchronous Data Read |
It helps to repair and maintain your data. |
RPX File Path |
Select the path for RPX file. |
Sql Server UNC Name |
Set the network name. |
Backup Password |
To protect the backup user can set the password. |
Default Backup Path |
Select path where you want to take backup. |
Image Stored In |
Select the path where you want to store image. |
- Next option is "
 ". From here you can set E-mail and SMS details.
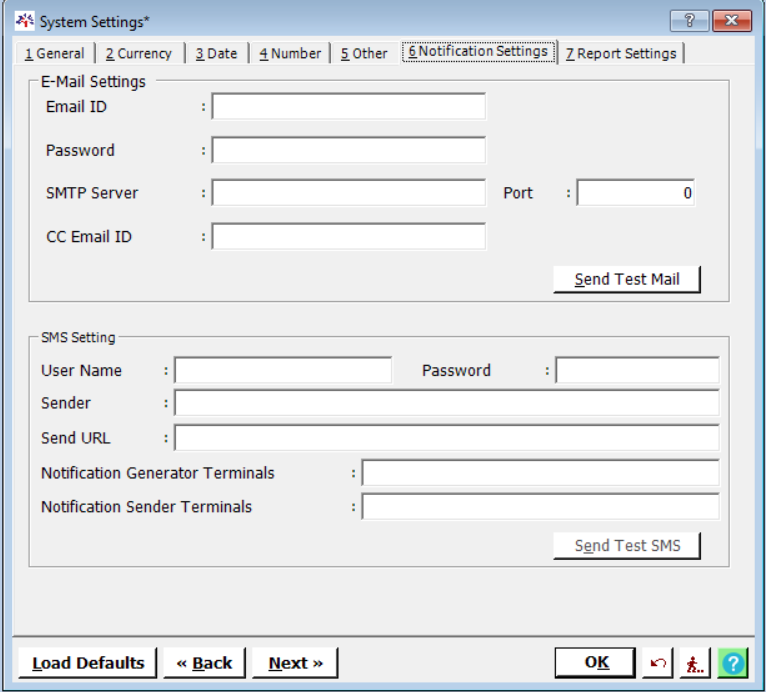
E-Mail Settings |
Email Address |
Enter your Email address. |
Password |
Enter the password. |
|
SMTP Server |
For Gmail account email address, the SMTP server will be 'smtp.gmail.com'. For a Yahoo email address, the SMTP server will be 'smtp.mail.yahoo.com'. |
|
Server Port |
You will get the server port from help. |
|
CC Email ID |
Enter the CC Email address |
|
SMS Settings |
User Name |
Enter the user name |
Password |
Enter the user password.(App Password) |
|
Sender |
Enter name of sender |
|
Send URL |
Enter API given by SMS provider as shown in the above image. |
|
Notification Generator Terminals |
Enter the name of the terminals which can generate the notification. |
|
Notification Sender Terminals |
Enter the name of the terminals which can send the notification. |
|
8. Switch to last tab option "![]() ", Here you can change the Report settings according to the requirement.
", Here you can change the Report settings according to the requirement.
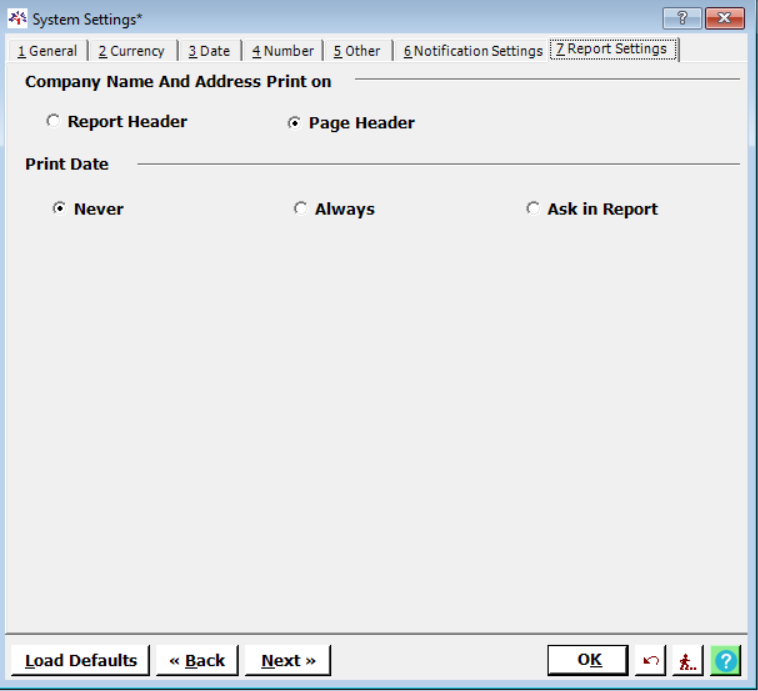
Company Name and Address Print on |
Report Header |
Enable this option to display the Name and Address in the Report Header. |
Page Header |
Enable this option to display the Name and Address in the Page Header. |
|
Print Date |
Never |
Disables the printing of the date in the report. |
Always |
Ensures the date is always printed on the report. |
|
Ask in Report |
Prompts the user to decide whether or not to include the date when generating the report. |
Created with the Personal Edition of HelpNDoc: Create iPhone web-based documentation