Transactions
Here are the steps to do Bank Reconciliations. To learn more, you can also watch this RADIX Online tutorial video:
To do Bank Reconciliations in Radix, follow the steps below:
- After logging in to the Company Main menu, go to Transactions > Bank Reconciliations > Transactions.
- Choose a daybook' form will open. Select the daybook from the list of daybooks displayed and press Enter key or click on OK button.
- Selected bank daybook form will open. Set details here such as:
- From Date, To Date - Select the date for which you want to do bank reconciliations.
- Type - Select the entries you want to view, Receipts/Payments/Both.
- Filter - Select the transactions you want to view, Cleared/Un-cleared/Both.
- Wise Total - Select from the list of options displayed.
- Balance as per Bank - Enter the bank statement's Closing balance amount here.
- List of transactions will be displayed according to the selected criteria. In Clearing Date field, enter the date as per the bank statement. To enter clearing date, press add "+" key and to remove the same, press minus "-" key.
- Enter the clearing date for all the transactions and difference will become Zero. If the difference is not equal to Zero, then it means that there is change in bank statement and the transaction entries. In order to tally both, you need to resolve them and make the difference Zero.
Alternate Option: Use the Import from Statement option to reconcile your bank statement using an Excel file.
Auto-Reconciliation of bank statements & Importing of pending entries
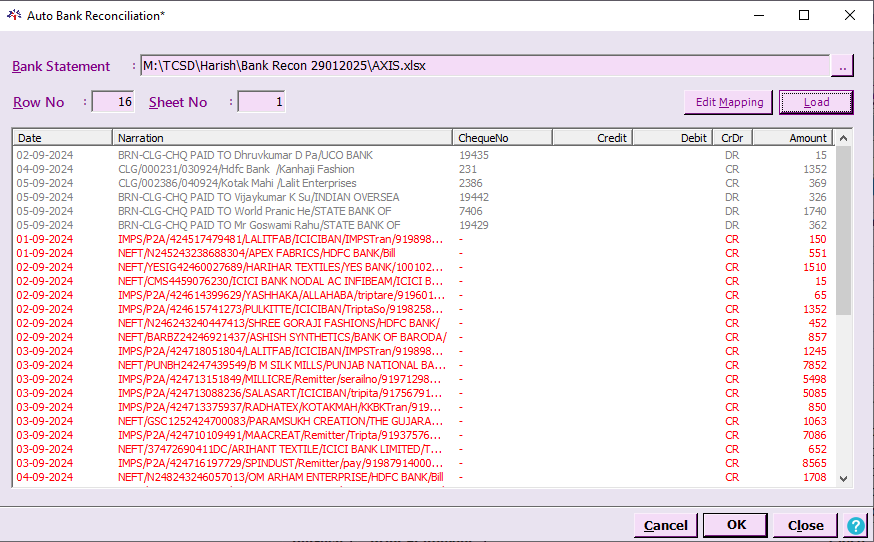
- Click on Import from Statement and select your Bank statement Excel sheet or CSV file
- Row No: Enter the row no of column headings row from the selected excel file.
Note: Enter the heading row number of the excel sheet as the Row No.
- Sheet No: Enter Sheet Number if there's multiple sheets in in Excel sheet or CSV file.
- Template: Use this option to save the mapping template for repeated use.
- Click on Load button then follow the steps mentioned below:
- Set Mapping by matching the Excel sheet's fields with the required fields.
- Click the Validate button to check if the mapped data is valid.
- Once validation is complete, click OK button.
- The mapped entries from the Excel statement will be auto-displayed on the screen, as shown below.
- All matched entries are reconciled, while unmatched ones appear under "Unmatched Bank Statement Records" due to missing or mismatched records.
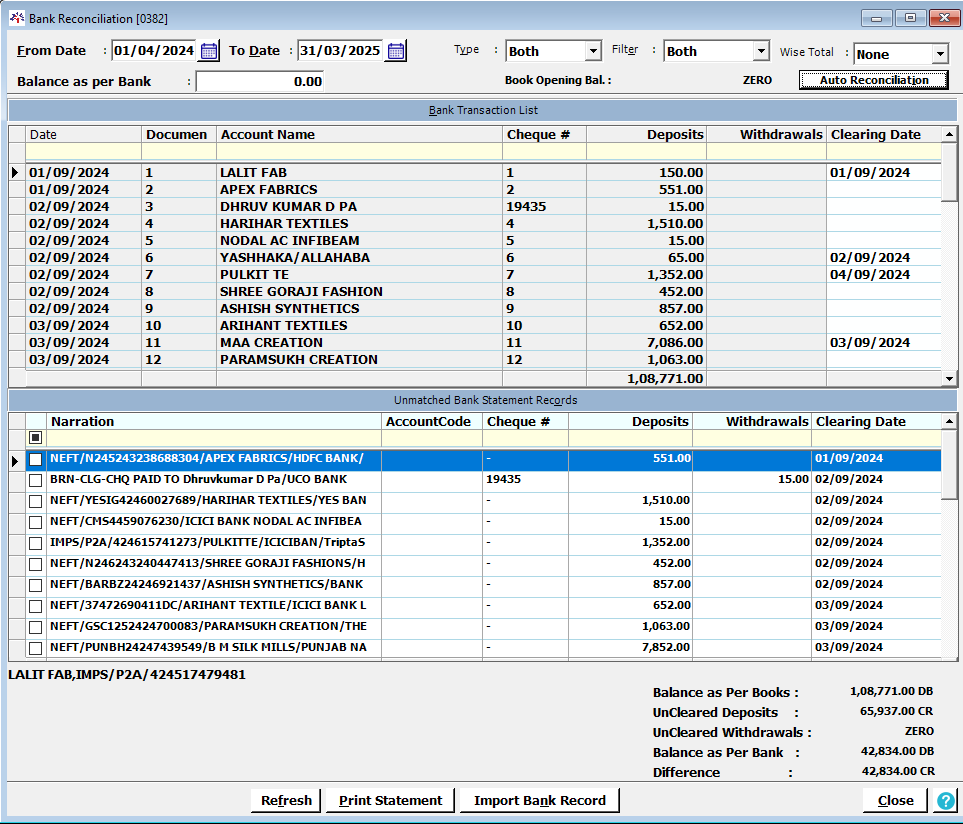
- If the amount matches, you can mark the entry as cleared by clicking the "+" button.
- If any entry is missing from the software, you can import those records by clicking the Import Bank Record button and selecting the relevant account for multiple selected entries at once.
- To print the statement, click the Print Statement button.
- Once the reconciliation process is complete, click the Close button to finalize your bank reconciliations.
Related Topics:
1. Open Company
Created with the Personal Edition of HelpNDoc: Write eBooks for the Kindle